Background Part 2- DIY CNC Machine Project
Posted by Jonathan Gee on Feb 25, 2022
WHAT GOT ME ON THE DIY CNC BUILD JOURNEY THEN.
EMG CNC
Project Background
[Part 2]
Posted by Jonathan Gee,
25 Feb 2022
This is a privately funded project that frequently sees shortage of funds delaying progress, If you are enjoying this build diary and would like to contribute to the completion of this project and all the future guides and video journeys it would be gratefully received and spent directly on this project. Donate through PayPalMe Here...
Background (Part 2)
Lets Start with some old pictures....
Design ideas continued...
I continued to play around with design ideas but a new topic became an hot issue.. This was whether to use a ballscrew or rack and pinion. There are a number of pros and cons for either system, but after a long learning curve really it became obvious that if you are serious about your build, then 1 to 1.5 metres is a reasonable and practical limit to using Ballscrews in this application. I have seen many a build at 2.5 metres long using 16 or 20mm diameter ballscrews, and any physics tells you that this is not adequate. the potential for whipping is practically inevitable if you think along these lines.
As my thought train rolled down the rails, I increasingly became passionate about building a machine correctly with the equipment fitted to it, specified correctly for the application. But at this stage in the project I was still playing with ideas. I now turned my attention to the design of a Z axis. The idea around this was that i could use the assembly as a an excercise to A build part of the build and B test what level of precision and fit I could achieve with just basic tools. I had a floor mounted Sealey Radial Pillar Drill to work with for the drilling of assembly holes etc.... I shopped around a bit and settled on a compound slide table to use on the Pillar drill to help make minor location adjustments. I could also easily index dimensions for drilling holes reasonably accurately..
Sealey Radial Pillar Drill
Compund Slide table i purchased.
I also picked up a digital height gauge to fix the the pillar drill.
I picked up a small cast iron surface plate to help setting the Z components.
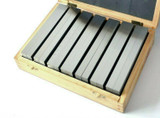
A selection of Stephensons blocks became extremely useful for reasons i will clarify later on.
Fabricated a bracket frrom aluminium to hold the height gauge with a piece of threaded bar for making hard depth stops.
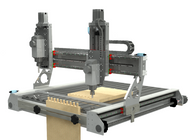
This was a more detailed concept design that I made that gave me the opportunity to develop a Z design that I could design and actually manufacture pretty soon. You might notice here that i also incorporated the ability to clamp stock vertically so that you can machine an unlimited array of joints. I have not seen this on a CNC router before but the potential benefits are endless.
So what did I learn at this stage....
A pattern was developing here and that was that you continue to obsess about the design and if you lose or gain some working footprint. As i moved towards a finalised concept for the project, the thought of losing 50mm in Y did not bother one little bit if it was for the right reasons.
Key Learnings....
- Work backwards with your design from the foot print you require. You might be tempted to draw a 1metre square assembly and then become surprised at the end that you are only achieving a 600x400 worktable footprint.
- Something that I will never understand aslong as I have bones in my feet is why some people design Z axis assemblies that are 800mm tall when the base of the gantry is only 200mm from the top of the machine bed. Really, please someone tell me whats going on there. Don't do it. You are just creating a large wobbly weight on the top emphasing every little bit of flex.
- Consider revolving your design around the purchase ground tool plate or bar. This way you can be sure that the widths and thicknesses are accurate and consistent.
- Consider using dimensions that you can replicate easily with stephensons blocks. These are very accurate and make first assemblies very easy to get very accurate the first time round.
- Don't ever think that your rails are going to help you provide rigidity. This is not how they are designed. They are not design to add strength. Design your Z assmebly correctly and plan for limit switches and dust/coolant protection early if thats what you want...
Coming up next: The Background work Part 3...
Follow the Build on Instagram
Follow the Build on Facebook
Follow Us on LinkedIn
Originally Uploaded On: 25/02/2022
Last Updated On: 25/02/2022
Estimated Date Period: : Oct 2020
This is a privately funded project that frequently sees shortage of funds delaying progress, If you are enjoying this build diary and would like to contribute to the completion of this project and all the future guides and video journeys it would be gratefully received and spent directly on this project. Donate through PayPalMe Here...
SUBSCRIBE TO OUR BUILD BLOG
Recieve our latest blog posts, build diary updates, weekly releases, offers, guides and more.
THIS BUILD DIARY IS ONLY HOSTED ONLINE BY EMG PRECISION LTD. IT IS A PRIVATE HOBBY PROJECT BY MYSELF, JONATHAN GEE. THIS PROJECT BLOG IS ONLY A DIARY OF EVENTS WITH SOME IDEAS FOR HOW I FELT THE PROCESS WENT WITH SOME TECHNIQUES I FOUND USEFUL. THIS IS NOT AT ALL AN OFFICIAL GUIDE OF HOW TO DO THINGS AND YOU SHOULD SEEK PROFESSIONAL ADVICE FROM COMPETENT PERSONS AND CONDUCT RISK ASSESSMENTS BEFORE UNDERTAKING ANY OF THE TASKS SHOWN IN THIS PROJECT BLOG DIARY.


 GBP
GBP US Dollar
 Euro
Euro
 Norwegian Krone
 Canadian Dollar
 Bulgarian Lev
 Polish Zloty
 United Arab Emirates Dirham
 Australian Dollar
 Swiss Franc
 New Zealand Dollar
 Russian Ruble


