Surface Plate Preparation & Drilling - Part 3
Posted by Jonathan Gee on Feb 27, 2022
THANK GOODNESS THOSE 8 HOLES ARE OVER. ONLY 200 LEFT TO GO
DIY CNC Granite Surface Plate Preparation & Drilling
[Part 3]
Posted by Jonathan Gee,
27 Feb 2022
This is a privately funded project that frequently sees shortage of funds delaying progress, If you are enjoying this build diary and would like to contribute to the completion of this project and all the future guides and video journeys it would be gratefully received and spent directly on this project. Donate through PayPalMe Here...
Granite Surface Plate Drilling - Part 3
Welcome to Part 3 of the granite plate drill blog. I hope you enjoy.
Here you can see an alternate way i ended up guiding the core drill. Basically by nailing two pieces of wood separate by the core drill and a bit. I would advice to make sure that any jigs that you create do not bind tigthly ont he core drill, as this will result in a lot of the energy being wasted on friction in the wrong places. What I eventually found easiest to do was to set the jig up so if the core drill rested on the jig naturally, it would need to be lifted a couple millimetres to get it close to square. I knew then that when i began drilling i could simply use the jig as a reference point and tilt the drill in the correct direction so i knew i was close to square, or close enough to not cause any issues later on.
With this view (Picture Above) you can clearly see how the side pieces will rest on the box section ready for permanent fixing.
After significant research I settled on this Hybrid Resin Cement Mix. It is described as a high performance, hybrid mortar injection resin. Styrene-free, quick cure. Contains resin and cement for maximum loads, supplied with one nozzle. Suitable for most masonry types. Fire-rated F120. Use with Injection Tool (sold separately).
FISCHER FIS V HYBRID MORTAR RESIN 360ML (88507)
I looked into the standard for this product, and in my application with the size of inserts I was using the bolts could be tightened up to 150Nm with this stuff. I would hazard a guess and say that I easily applied over 200Nm to these when I tightened them up. You could literally hang a house from one of these when the forces are perpendicular to the hole centre line.
I have never used this stuff before, but I knew I had to work quickly so I didn't manage to get any photos or video of this process. But, in all honesty, I would rather show you the technique I found most effective 200 inserts later. It is not cheap. At the time I purchased the majority of this it was running at £22 per tube. I spent over £250 on this during the course of my build so far and I haven't finished yet. From Screwfix, it is currently on offer at a little over £16 per tube. You will find that you need to buy extra mixing nozzles. If you are working with this in the summer time, you only get a minute or two before this has set. The combination of resin and mortar makes it a grainy type of adhesive that gets quite hot and goes rock hard. You can only get it off by grinding it afterwards, so keep your job and internal threads clean. In summary though, this stuff was amazing, and it really impressed me. Highly recommended but you don't get much margin for error. Until you get a feel for it, I would buy plenty of spare nozzles and do a couple inserts at a time. Like I said, I will cover this topic in more detail later on, with a guide for centring the inserts and dosing the holes correctly.
I created a basic jig for aligning the core drill to ensure that it was within a degree or two squareness. You will struggle to achieve anything better with a hand drill. Especially because you almost instantly become fatigued. God the nightmare flashbacks i am having right now!! If you choose to do the drilling outside and use a hosepipe feed, expect the whole place to be flooded leaving a granite powder sludge that is horrible to clean up. The cost of doing business I suppose. Below is a short video of some of the drilling.
Having been quite conscious about chipping or fracturing the granite, I was concerned that the action of tightening the bolts might crack or fracture the granite around the hole surface compromising the torque achieveable. I decided to fit two 15 mm aluminium plates the spread the load and prevent potential granite damage. I bought these oversize because I had not finalised the design of the enclosure and the drainage system at this stage.
You can see here that i managed to get a clean fill of the cement resin and managed to keep the inserts centralised in the holes. Overall i was quiet happy with the outcome.
The little one helped me wind the bolts in bless her.
I was unclear about how i should prepare the two clamping faces prior to making the final clampdown. After a discussion with Odlings about what they do when assembling granite parts of this size, they reccomened using a no more nails type product. They said it provides the right level of resistance when clamping together and squeezing excess out, It fills any imperfections at voids, aswell as providing an adhesive function. I went with EVO Stick's Sticks Like Sh*t!!
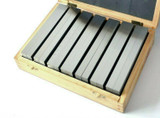
I did not run into any issues with squareness to the base once clamped up. Basically because it was a high flat, ground and polished face butting up against the square edge of a surface plate, which is already pretty damn accurate. I didn't have to make any manual adjustments to make them perpendicular. I purchased a few sets of cheap feeler gauges which I used to shim up to get the two pieces of granite close to each other prior to the final grind.
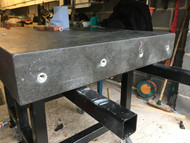
Even at this stage, and sat on a base on wheels, it is really quite difficult to move around. if you plan to undertake something similar make sure you work on a surface that is flat and smooth enough to enable you to move the unit about.
You will use a lot of water. You will probably just have to accept that there will be granite dust sludge everywhere to clean up later. It doesn't set or anything so that’s ok.
I can't speak for any other types of insert adhesives as I have only used this one Fischer Type. mason Nettles, who is also build a similar granite mill used a sole resin, and he did have issues with some of the inserts pulling out easily in one cylindrical tube of resin with an insert in the middle. I imagine it is the smooth nature of the resin versus the grainy nature of a hybrid resin mortar mix that allows it to bite more effectively.
There were many more holes to drill in the granite. The current design for the gantry alone required 120+ holes to be drilled in the granite and inserts cemented in. I had specified 30mm rails all round, so the bolts required for that size are M8's. Obviously this requires M8 internally threaded inserts which require a 16mm diameter core drill to be bored to a depth of 95-100mm. I will cover this process in much more detail in a later article.
Some people have questioned why I didn't mount the granite sides on top of the surface plate. There were a number of reasons why I chose not to do this...
- I did not want to sacrifice that beautiful real estate of finely tuned surface plate.
- I was more than confident that I could achieve sufficient clamping pressure and adhesion that this would not be a problem.
- Clamped against a side, the Y pieces of granite and more resistance to flexing in and out and there simply is no give whatsoever in the vertical direction downwards. I would have had to drill holes through the face of the surface plate, and it seemed much more likely to create fractures in the granite drilling through holes, tha simply drilling blind holes.
- The sides of the surface plate were highly accurate ninety degree angles so I had an accurate edge for which to clamp against.
I hope that clears up some off the reasons behind why I chose the method of assembly that I did.
Please feel free to ask any questions or provide any feedback in the comments section below... I am not sure what article is coming next, but I think I have run out of steam on this Sunday evening.
Continue to Whatever it is thats coming next (Coming Soon!)
Originally Uploaded On: 27/02/2022
Last Updated On: 27/02/2022
Estimated Date Period: : 01/10/2021
This is a privately funded project that frequently sees shortage of funds delaying progress, If you are enjoying this build diary and would like to contribute to the completion of this project and all the future guides and video journeys it would be gratefully received and spent directly on this project. Donate through PayPalMe Here...
SUBSCRIBE TO OUR BUILD BLOG
Recieve our latest blog posts, build diary updates, weekly releases, offers, guides and more.
THIS BUILD DIARY IS ONLY HOSTED ONLINE BY EMG PRECISION LTD. IT IS A PRIVATE HOBBY PROJECT BY MYSELF, JONATHAN GEE. THIS PROJECT BLOG IS ONLY A DIARY OF EVENTS WITH SOME IDEAS FOR HOW I FELT THE PROCESS WENT WITH SOME TECHNIQUES I FOUND USEFUL. THIS IS NOT AT ALL AN OFFICIAL GUIDE OF HOW TO DO THINGS AND YOU SHOULD SEEK PROFESSIONAL ADVICE FROM COMPETENT PERSONS AND CONDUCT RISK ASSESSMENTS BEFORE UNDERTAKING ANY OF THE TASKS SHOWN IN THIS PROJECT BLOG DIARY.


 GBP
GBP US Dollar
 Euro
Euro
 Norwegian Krone
 Canadian Dollar
 Bulgarian Lev
 Polish Zloty
 United Arab Emirates Dirham
 Australian Dollar
 Swiss Franc
 New Zealand Dollar
 Russian Ruble


