Granite Gantry Rail Drilling Part 1
Posted by Jonathan Gee on Mar 01, 2022
DEEP IN THE THICK OF IT NOW!!
Drilling Granite for Mounting Rails
[Part 1]
Posted by Jonathan Gee, 1st March 2022
This is a privately funded project that frequently sees shortage of funds delaying progress, If you are enjoying this build diary and would like to contribute to the completion of this project and all the future guides and video journeys it would be gratefully received and spent directly on this project. Donate through PayPalMe Here...
Rail Mounting Hole Drilling
The inserts I used were by a company called JCP and are called Internally Threaded Sockets, or Internal Thread Sockets. I opted for the stainless steel version and they will set you back about £3.00 ~ £3.50 each. One thing you really have to get to grips with, is that if you choose to build a granite machine, you can't scrimp on the type of adhesives and hardware that you will use. If you do, everything that is connected to the granite with immediately your weakest link. It is not a cheap affair either, expecially if you intend to build something of a reasonable size. There were 18 holes required just for one 1300mm rail, so you are talking £60 per rail in inserts alone, never mind adhesive, where i required two tubes for one of these rails. All in all, each 1300mm rail cost about £100 in inserts and resin/mortar mix, and I haven't included the bolts. It is a large committment, obviously this is all relative if you are wealthy but, if like the rest of us, you don't have cash to burn, you really should use some of the things I have talked about to help you budget for your project. The last thing you would want is to get half way through and have to abandon it. It really is a lot of work to not be 100% committed to its completion.
I went through boxes and boxes of these things.. Afterall, there was 120 holes to be drilled in the gantry alone. I think I did about £600 in inserts in total and maybe £300 in Fischer Resin/Mortar Cement.
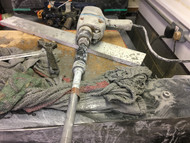
The assembly of adaptors required to connect the core drill to the drill chuck. I used plenty of grease on these threads, re-applying from time to time because you have to undo these quite often to clear blockages from the core drill. Sometimes on multiple occasions per hole if the core happens to break off and become lodged in the drill bit.
These are the core drills i purchased from Golz UK. I orignally purchased two and they almost completed the bulk of the work. I did have to get two more for future requirement. These came in at about £25 each which i think was well worth it considering i got between 80~100 holes out of each one with a constant water source.
Expect to get totally and utterly filthy! It was approaching winter time when i did the majority of this work so i completed all of this work indoors. I used a number of plastic drainage channels i had to direct the sludge and water into strategically placed large buckets as to not end up flooding my workshop.
That's it for Part 1 of this section. We have covered the basics of hardware and equipment used. In Part 2 we will look at the actual drilling itself.
Please feel free to leave any questions, comments or feedback on this build diary blog.
Originally Uploaded On: 01/03/2022
Last Updated On: 01/03/2022
Estimated Date Period: : 01/11/2020
This is a privately funded project that frequently sees shortage of funds delaying progress, If you are enjoying this build diary and would like to contribute to the completion of this project and all the future guides and video journeys it would be gratefully received and spent directly on this project. Donate through PayPalMe Here...
SUBSCRIBE TO OUR BUILD BLOG
Recieve our latest blog posts, build diary updates, weekly releases, offers, guides and more.
THIS BUILD DIARY IS ONLY HOSTED ONLINE BY EMG PRECISION LTD. IT IS A PRIVATE HOBBY PROJECT BY MYSELF, JONATHAN GEE. THIS PROJECT BLOG IS ONLY A DIARY OF EVENTS WITH SOME IDEAS FOR HOW I FELT THE PROCESS WENT WITH SOME TECHNIQUES I FOUND USEFUL. THIS IS NOT AT ALL AN OFFICIAL GUIDE OF HOW TO DO THINGS AND YOU SHOULD SEEK PROFESSIONAL ADVICE FROM COMPETENT PERSONS AND CONDUCT RISK ASSESSMENTS BEFORE UNDERTAKING ANY OF THE TASKS SHOWN IN THIS PROJECT BLOG DIARY.


 GBP
GBP US Dollar
 Euro
Euro
 Norwegian Krone
 Canadian Dollar
 Bulgarian Lev
 Polish Zloty
 United Arab Emirates Dirham
 Australian Dollar
 Swiss Franc
 New Zealand Dollar
 Russian Ruble


